Showing posts with label simple recipe. Show all posts

Tuesday, August 30, 2016

Spicy Chickpea Salad Sandwiches

It's too hot to cook, and - despite what all my Facebook friends say - it's still summer...and I'm lazy these days. Which is why this blog has been seriously lacking in recipes lately. (Come the REAL fall, I'll start cooking again. I promise).

Anyway, my laziness has led me to whip up all of the no-cooking-required recipes I can (which equates to about one per week these days). And when I was looking for a way to use up leftover chickpeas recently, these hot weather-friendly sandwiches were born.

Spicy Chickpea Salad Sandwiches | A Hoppy Medium

This recipe is completely customizable, depending on what you like in your sandwiches. And if you have a 15-ounce can of chickpeas lying around, you can still use that with the ingredients below (it won't make much of a difference in terms of flavor/texture). But whatever you do...just make these. I promise you'll like them.

Spicy Chickpea Salad Sandwiches
Serves: 2
-1 1/2 cups chickpeas, drained and rinsed
-2 tablespoons Trader Joe's Wasabi Mayonnaise (or whatever mayonnaise you prefer)
-1 tablespoon diced dill pickles
-Salt and black pepper
-4 slices good bread (I used Dave's Killer Bread Powerseed)
-2 slices Havarti cheese (or whatever cheese you prefer)
-1/2 avocado, sliced
-Tomato slices
-Arugula
-Dijon mustard

Directions:
1.) In a food processor, pulse chickpeas until slightly mashed, but not pureed (you want some texture; not hummus). You can also mash the chickpeas with a fork, if you don't have a food processor. 
2.) Transfer chickpeas to a small bowl. Stir in the mayonnaise and dill pickles; season with salt and black pepper. 
3.) Toast the bread lightly, with a slice of cheese on two of the slices of bread, to let it melt. Lightly smash 1/4 of the avocado evenly on two slices of bread. Scoop the chickpea mixture evenly over the avocado (you may have some leftover, depending on how full you want your sandwiches). Layer as you wish with additional ingredients (I added tomato, arugula, and a drizzle of Dijon).

Spicy Chickpea Salad Sandwiches | A Hoppy Medium

This really is a great alternative to tuna, or even egg salad (although, I do love a good egg salad). This here is protein-packed and not drenched in mayonnaise, so you can feel full without any of the guilt. 

Now...make a batch of these, get outside, and go enjoy the rest of your summer! 

Tuesday, August 9, 2016

Quinoa with Mushrooms and Sausage

We're about to get really healthy up in here.

But I can't help it. The markets here in Portland are brimming with incredible produce right now, and I must taste everything. 

Last week's fun find? Beautiful oyster 'shrooms.

Oyster Mushrooms | A Hoppy Medium

And in an attempt to balance out all my beer carbs with healthy meals, this protein-packed dish was born. (Bonus: It doesn't taste as healthy as it is!).

Quinoa with Mushrooms & Sausage | A Hoppy Medium

Quinoa with Mushrooms & Sausage
Yields: 4 servings
-1 cup quinoa
-2 tablespoons extra virgin olive oil
-1 small yellow onion, diced
-1 clove garlic, minced
-5 ounces oyster mushrooms, roughly chopped
-1/2 teaspoon dried thyme
-Healthy pinch of crushed red pepper flakes
-Salt and black pepper, to taste
-1 1/2 cups baby spinach
-Splash of good Balsamic vinegar
-Crumbled feta cheese, for serving

Directions:
1.) Cook quinoa according to package directions. While quinoa cooks, heat olive oil in a large skillet over medium to high heat. Add onion and garlic and cook, stirring occasionally, until onion begins to soften - about 5 minutes.
2.) Add mushrooms, dried thyme, and crushed red pepper to the pan. Cook until mushrooms begin to soften slightly, about 3-4 minutes. Add sausage and cook until heated through. Season with salt and pepper.
3.) In a large bowl, mix quinoa with onion, mushroom, and sausage mixture. Stir in baby spinach and let wilt; add a splash of Balsamic. Taste, and season with salt and pepper as necessary. Serve with crumbled feta on top (because feta makes everything better).

Quinoa with Mushrooms and Sausage | A Hoppy Medium

This dish is a nutrient powerhouse. Protein-packed quinoa, mushrooms, and sausage + vitamin-laden spinach - with the feta cheese helping to make it seem not so healthy. Given the protein factor in this dish, it's also super satiating. Win-win!

Oh, and if you can't find oyster mushrooms, really any other mushrooms would do. And if you want to make this dish vegan? Simply leave out the feta.

What dishes have you cooked lately?

Thursday, July 28, 2016

Easy Summer Slaw {Vegan}

We're lucky that here in Portland, we don't get the humidity we get back home in Boston. 80-90 degrees here has a nice breeze, and when the sun goes down? The temperature is beyond ideal...with few mosquitoes to bother us.

However...our highest temperatures for the day hit right before dinnertime (4-5 p.m.), which causes me to lose all motivation to cook. That's where no-oven-necessary recipes like this one come in handy.

Easy Summer Slaw | A Hoppy Medium

I made this slaw the other night when I had some haddock to cook up (yes, sometimes I eat fish!), but this slaw would also go with...just about anything. Tofu, burgers, sausages, you name it. It's just a versatile, tasty, easy-to-throw-together side dish - no extra heat required. 

Easy Summer Slaw | A Hoppy Medium

Easy Summer Slaw
Yields: 4-6 servings
-1/2 head red cabbage, cored and thinly sliced
-2 large carrots, peeled and shredded
-1/2 cup cilantro, roughly chopped
-1 jalapeno, seeded and diced (optional)
-2 tablespoons rice vinegar
-Juice of 1/2 an orange
-Salt and black pepper, to taste

Directions:
1.) In a large bowl, mix all of ingredients (before salt and pepper) together. Season as necessary with salt and pepper. 
2.) Cover and place in fridge for at least 30 minutes before serving (although overnight provides the best flavor!).

Easy Summer Slaw | A Hoppy Medium

Told you it was easy. ;)

What no-cook dishes are you loving lately?

Tuesday, June 21, 2016

Chickpea, Vegetable, and Feta Salad with Lemon-Tahini Dressing

Chickpea, Vegetable, & Feta Salad with Lemon-Tahini Dressing | A Hoppy Medium

Don't get me wrong: I love the usual pasta salads and potato salads that make an appearance at almost every summer barbecue. But sometimes, I'd like to not binge on carbs all day (keyword: sometimes). And if I'm the one responsible for said "side dish," in the middle of the summer heat wave, I sure as heck don't want to cook anything either.

That, my friends, is where this side dish comes in.

No cooking required. No heavy carbs. Mostly just nutritious ingredients covered in tangy feta, lemon juice, and nutty tahini.

Let's eat.

Chickpea, Vegetable, and Feta Salad with Lemon-Tahini Dressing | A Hoppy Medium

Chickpea, Vegetable, & Feta Salad with Lemon-Tahini Dressing
Yields: 6 servings

Salad:
-1 15-ounce can chickpeas, drained and rinsed
-1 red bell pepper, diced
-1 cucumber, seeded and chopped
-3 scallions, chopped (white AND green parts!)
-1/4 cup fresh parsley, chopped
-1/4 cup crumbled feta cheese
-Salt and black pepper, to taste

Dressing:
-2 tablespoons tahini
-Juice of 1 lemon
-1 tablespoon olive oil
-Salt and black pepper, to taste

Directions:
1.) In a large mixing bowl, combine chickpeas, vegetables, parsley, and feta cheese. Season lightly with salt and black pepper; refrigerate for 30 minutes.
2.) After 30 minutes is up, whisk dressing ingredients together in a small bowl. (Texture of "dressing" will be thick; this helps prevent any leftovers from getting runny and soggy). Carefully stir dressing into salad until well-coated. Serve, and enjoy!

Chickpea, Vegetable, & Feta Salad with Lemon-Tahini Dressing | A Hoppy Medium

Summer in a bowl. With lots of feta for good measure. 

Your next barbecue needs this.

Thursday, June 16, 2016

Garlic Naan Pizzas with Goat Cheese, Sausage, and Onion

I actually am trying to be more fit these days.

To help balance out all those beer calories, I've been eating healthier (during the week, at least) and hopping on the treadmill at least four times a week. And it's working. However, I still crave some freakin' pizza Monday through Friday. I'm only human!

That's where these healthier, super-easy-to-make, weekday delights come in.

Vegetarian Garlic Naan Pizzas with goat cheese, sausage, & onion | A Hoppy Medium

These Garlic Naan pizzas are the perfect thing to whip up when you have leftover naan (like I did); or, if you just want to buy a brand new package and make a quick, healthier version of your favorite pizza.

Vegetarian Garlic Naan Pizzas with goat cheese, sausage, & onion | A Hoppy Medium

I used toppings that were already in my fridge, but feel free to change up the toppings to your preferences. 

Here's what it took to make three of these little guys:

Garlic Naan Pizzas with Goat Cheese, Sausage, & Onion
Yields: 3 servings (with a large side salad)
-3 pieces of garlic naan
-1 tablespoon extra virgin olive oil
-1 clove garlic, minced
-1 cup pizza sauce (jarred or homemade)
-Toppings: goat cheese; 1 link Field Roast Italian Sausage, sliced; thinly sliced red onion

Directions:
1.) Preheat oven to 400 degrees. Place naan on an ungreased, non-stick baking sheet. Brush each piece of naan with olive oil, and evenly sprinkle on minced garlic. Spoon pizza sauce evenly over each piece; top with your desired toppings (or, toppings mentioned above).
2.) Bake at 400 degrees for 10-15 minutes, or until naan is crisp and goat cheese is softened/starting to brown.

Vegetarian Garlic Naan Pizzas with goat cheese, sausage, & onion | A Hoppy Medium

I mean...how easy is that? Leftover naan no longer stands a chance.

What's your biggest, guilty pleasure craving? Besides pizza, I'm always craving nachos. Always.

Tuesday, May 24, 2016

Farro Salad with Black-Eyed Peas, Red Pepper, and Arugula

We've gone from rice to farro, friends.

Farro Salad with Black-Eyed Peas, Red Pepper, & Arugula | A Hoppy Medium

Farro is an ancient wheat grain that I somehow always forget about. I typically go for couscous or quinoa in the same grocery store aisle, forgetting about these little pearls of high-fiber goodness. (Bonus: Farro's also awesome for those who are sensitive to gluten - while it's not gluten-free, it contains lower levels than most of today's wheat products, and, if prepared properly, the gluten is pre-digested and broken down by sprouting and fermentation (like a sourdough process, essentially)). 

To up farro's nutritional ante in this recipe, I added black-eyed peas for protein, red pepper and arugula for texture and nutrients, and plenty of garlic, onion, Parmesan cheese, and even a little white wine for extra flavor.

Dig in!

Farro Salad with Black-Eyed Peas, Red Pepper, & Arugula
Yields: 6 servings
-3 cups homemade vegetable stock (or low-sodium store-bought)
-1 cup dry farro
-2 tablespoons extra virgin olive oil
-1 small red onion, diced
-1 large garlic clove, minced
-1 large red bell pepper, diced
-1 15-ounce can black-eyed peas, drained and rinsed
-Pinch of crushed red pepper
-Salt and black pepper, to taste
-Splash of dry white wine (I used Pinot Grigio)
-2 large handfuls of baby arugula
-1/4 cup grated Parmesan cheese
-Squeeze of fresh lemon juice

Directions:
1.) In a large pot, bring vegetable stock to a boil. Stir in farro, and lower heat to simmer; let cook for 20 minutes, or until farro is tender. Strain any excess stock and set aside.
2.) In a large saute pan, heat olive oil over medium-high heat. Add onion and garlic and cook until onion is almost translucent, about 4-5 minutes, stirring constantly. Add bell pepper and cook until it begins to soften, about 3-5 minutes. 
3.) Add black-eyed peas, crushed red pepper, and salt and black pepper to the saute pan. Add a splash of wine, scraping any excess flavor from the bottom of the pan. Add the arugula and cook until just wilted, about 2 minutes.
4.) Off the heat, add in the Parmesan cheese and a healthy squeeze of fresh lemon juice. Stir black-eyed pea, pepper, and arugula mixture into the cooked farro. Serve salad warm, or refrigerate and serve cold later. (It's even better the next day!).

Farro Salad with Black-Eyed Peas, Red Pepper, & Arugula | A Hoppy Medium

This salad made a delectable side dish alongside some vegetarian sausages and a green salad, but a big bowl of it also made the perfect work day lunch. 

Do you have a favorite farro recipe? 

Wednesday, May 18, 2016

Sweet and Spicy Tempeh Stir-Fry {Vegan}

I admit: I've been a little obsessed with rice lately.

Sweet & Spicy Tempeh Stir-Fry | A Hoppy Medium

About 95% of my recipes on here have been "over rice." I get it. I have a problem. And I promise this is the last one for a while.

I've just been on a rice kick as a way to avoid eating too many heavy carbohydrates at dinner time. I tend to drink several beers during the week, and I'm always looking for ways to cut back on my nightly carbs. But I get it: too much rice is a boring thing.

But before I go on my rice hiatus, I needed to share one more best-over-rice recipe...because it's tasty, easy to throw together, and super satiating. You'll forgive me, right?

Sweet & Spicy Tempeh Stir-Fry | A Hoppy Medium

Sweet & Spicy Tempeh Stir-Fry
Yields: 4 servings
-One batch of Chile-Garlic Sauce (minus the tofu, obviously)
-12 ounces tempeh, cut into chunks
-2 tablespoons extra virgin olive oil
-1/2 large yellow onion (or 1 small), thinly sliced
-1 large garlic clove, minced
-2 red bell peppers, cut into strips
-1 medium bunch asparagus, chopped
-1 small jalapeno, seeded and diced
-1 8-ounce can pineapple chunks (in their own juice; not syrup!); cut chunks in half
-Splash of low-sodium soy sauce
-Salt and black pepper, to taste
-1 cup cooked Basmati rice
-For garnish: roughly chopped raw cashews and chopped fresh cilantro

Directions:
1.) In a medium bowl, mix tempeh with Chile-Garlic sauce, ensuring each piece of tempeh is coated with the "good stuff." Cover and place in fridge for 30 minutes.
2.) In a large saute pan, heat olive oil over medium-high heat. Once hot, add onion and cook until almost translucent, about 3-4 minutes. Add garlic and stir for about 30 seconds, or until fragrant.
3.) Add peppers and asparagus to the pan. Cook until both begin to soften, and asparagus is almost fork-tender (about 5 minutes). Add jalapeno and marinated tempeh (and all the excess sauce!) and stir, cooking for an additional 3-4 minutes. Add pineapple and soy sauce and cook for 2-3 more minutes, or until pineapple is warm. Taste, and season as necessary with salt and black pepper.
4.) Scoop the stir-fry mixture over (or next to) a bed of Basmati rice. Garnish with chopped cashews and plenty of fresh cilantro.

Sweet & Spicy Tempeh Stir-Fry | A Hoppy Medium

The crunchy cashews, sweet pineapple, spicy tempeh, and boat-load of vegetables is an incredible combination here. Marinating the tempeh is also crucial - the Chile-Garlic Sauce not only gives the tempeh itself a world of flavor, but it also acts as the main flavor throughout the entire dish.

Oh, and P.S.: This is one of those dishes where the leftovers are even better than the original serving. So get ready for some epic work lunches this week.

Not into tempeh? Substitute it for tofu, chicken, or shrimp - any of the above would work wonderfully here.

Tell me: Are you a rice fan? Or are you just as ready for a "rice hiatus" as I am?

Wednesday, May 11, 2016

Veggie-Packed Thai Red Curry

After this last week and a half, my body is in desperate need of vegetables.

Veggie-Packed Thai Red Curry | A Hoppy Medium

For a full straight week, I ate every meal out - Z and I traveled to San Francisco for work (and play - more on that later), and then my parents came to Portland for a long, delightful weekend. And while all of that was too much fun, it's time for me to get back on track - and remind my body that vegetables exist.

Veggie-Packed Thai Red Curry | A Hoppy Medium

I actually made this dish before we left for San Francisco, but it's a fitting recipe for my much-needed detox, and for your impending bathing suit season. (Or, you know, your need to just want to eat healthy every once and a while). This dish is nutritious, filling, and oh-so easy to make during the week - with great lunch leftovers to boot.

Veggie-Packed Thai Red Curry
Yields: 4 servings
Adapted from Cookie + Kate
-2 tablespoons extra virgin olive oil
-1 medium yellow onion, diced
-1 tablespoon finely grated fresh ginger
-2 cloves garlic, minced
-2 red bell peppers, sliced into thin 2-inch long strips
-3 medium-size carrots, peeled and chopped (I used rainbow carrots)
-2 tablespoons Thai red curry paste
-1 14-ounce can light coconut milk
-1 1/2 cups packed baby kale
-1 1/2 teaspoons granulated sugar
-1 15-ounce can chickpeas, drained and rinsed
-Salt and black pepper, to taste
-Splash of low-sodium soy sauce*
-Splash of rice vinegar
-1 cup cooked Basmati rice
-Handful of chopped fresh cilantro, for garnish

Directions:
1.) In a large skillet, heat olive oil over medium heat. Add the onion and cook until softened and barely translucent, about 5 minutes. Add the ginger and garlic and cook until fragrant, about 30 seconds, stirring constantly.
2.) Add the bell peppers and carrots and cook until they are fork-tender, 3 to 5 minutes, stirring occasionally. Then add the curry paste and cook, stirring often, for 2 minutes.
3.) Add the coconut milk and kale to the pan along with 3/4 cup water and sugar. Bring the mixture to a simmer over medium heat. Reduce heat and add chickpeas, salt, and black pepper. Simmer on low heat until the peppers, carrots, and kale have softened to your liking, about 5 to 10 minutes.
4.) Remove the curry from heat and season with soy sauce and rice vinegar. Taste and season with salt and pepper as needed. Evenly divide rice and curry into bowls and garnish with chopped cilantro.

*In my rushed weeknight state, I accidentally added a splash of Balsamic vinegar instead of soy sauce. It came out fine, but just be sure to read your labels before adding. ;)

Veggie-Packed Thai Red Curry | A Hoppy Medium

Ah, vegetables! And home-cooking! How I have missed you.

What have you been up to lately?

Thursday, April 21, 2016

Baked Falafel Bowls with Tahini Sauce {Vegan}

Baked Falafel Bowls with Tahini Sauce {Vegan} | A Hoppy Medium

I'm not usually a fan of having the same dinner two nights in a row, so when I do, you know the dish has got to be good.

And these Baked Falafel Bowls with Tahini Sauce was one such dish I threw down my gullet in two consecutive nights.

Vegan Baked Falafel | A Hoppy Medium

Flavorful, crispy-on-the-outside falafel mixed with your choice of vegetables, a grain, homemade pickles (if you are so [smartly] inclined), and a super easy, homemade tahini sauce that will make the sesame angels sing.

Oh, and no matter which way you prepare this versatile dish, just be sure it's vibrant and eat-with-your-eyes-first-approved.

Got me? Good. :)

Baked Falafel Bowls with Tahini Sauce
Yields: 3 servings
Falafel:
-2 cups fresh parsley, roughly chopped
-3 large cloves garlic, peeled
-Juice of 1 lemon
-1/4 cup raw walnuts
-1 1/4 teaspoon ground cumin
-1/4 teaspoon ground coriander
-Pinch of cayenne (optional)
-Salt and black pepper, to taste
-1 15-ounce can chickpeas, drained and rinsed
-Generous drizzle of extra virgin olive oil

Tahini Sauce:
Adapted slightly from Minimalist Baker
-1/4 cup tahini
-1/2 tablespoon good maple syrup
-Juice of 1/2 a lemon
-3 tablespoons hot water to thin

Directions:
1.) Add parsley, garlic, lemon juice, walnuts, cumin, coriander, cayenne, salt, and black pepper to a food processor and mix to combine. Add chickpeas and olive oil, and pulse until incorporated and mostly smooth (some leftover chunks are A-OK).
2.) Transfer chickpea mixture to a mixing bowl. Stir to ensure everything is well combined. Using your hands, form mixture into 9 small patties, roughly 1/2-inch thick.
3.) Place falafel onto a non-stick baking sheet and refrigerate for 15 minutes (to help them firm up). Preheat oven to 375 degrees F.
4.) Once oven is preheated, bake falafel for 30-40 minutes, or until crispy and golden brown on each side - flipping once halfway through.
5.) While falafel cooks, prepare tahini sauce by whisking all of the above ingredients together (except water) in a small bowl. Add up to 3 tablespoons hot water until a pourable sauce is formed. Place in fridge, covered, until ready to use.

*For making these into a bowl, I simply plated the three falafel (per serving) with a handful each of arugula, sliced grape tomatoes, leftover pickled vegetables, and about 1/2 cup prepared rice. I then drizzled everything with the tahini sauce. However, the vegetables and toppings are completely versatile, so feel free to throw in whatever vegetables you have on-hand!

*Also: the falafel can dry up the longer they cook, and become crumbly. Definitely watch them closer to the 30-minute mark - if they're golden brown on each side, they can come out and be devoured.


Baked Falafel Bowls with Tahini Sauce {Vegan} | A Hoppy Medium

Um, the best part about these bowls? It was just barely 90 degrees here in Portland when I threw them together. Despite having the oven on for the falafel, being able to throw everything else ready to go into bowls was perfect for such a hot evening. (Tip to you and me: Make the falafel ahead of time, during the cooler hours, and dinner will be even easier/less sweaty).

What's your favorite everything-served-in-one-bowl dinner? 

Thursday, April 14, 2016

Quick Pickled Vegetables

Five years ago, if you told me I'd be obsessed today with pickling allthethings, I'd tell you you're crazy.

I've always loved pickled cucumbers, but pickled...well, ANYTHING else? Gross.

I'm not exactly sure where the transformation happened, but all I know is somewhere along the way, I became the opposite of my old I-hate-anything-besides-pickled-cucumbers self. And now: enter my latest obsession.

Quick Pickled Vegetables | A Hoppy Medium

Z and I vowed last week to experiment with pickling more things at home (we've only dabbled in this before), and I'm happy to say, our first big batch of pickled goodness turned out awesome. Oh, and the whole process is super freakin' easy.

Here's how to make bomb dot com [and quick] pickled vegetables.

Quick Pickled Vegetables | A Hoppy Medium

Quick Pickled Vegetables
Yields: About 1.5 Liters of pickles
-Your choice of vegetables - we used 1 bunch of radishes, sliced thinly; 2 large carrots, peeled and cut into coins; 1 jalapeno, sliced; 1 bunch asparagus, fibrous parts removed and stalks cut in half, just so they fit in my container; 1/2 yellow onion, sliced. (This amount of vegetables was just about perfect for the amount of vinegar, etc. below).
-2 cups water
-1 cup granulated sugar
-1 1/2 cups white wine vinegar*
-1 1/2 cups lite rice vinegar
-3 tablespoons salt
-3 large cloves garlic, sliced thinly lengthwise
-2 tablespoons dill weed

*Note: I only used the rice vinegar because I ran out of white wine vinegar. The rice vinegar made our pickles a bit sweeter, which we actually liked, especially because of the jalapeno. But, if you'd rather have a less sweet pickle, use 3 cups white wine vinegar.

Directions:
1.) Place all of your prepped vegetables in jars or containers with tight-fitting lids (lids can go on later). We put the asparagus and onion in one container; the remaining vegetables in the other, but you can mix it up however you wish!
2.) In a pot, mix together water, sugar, vinegars, salt, garlic, and dill weed. Bring the mixture to a boil. Once boiling, pour the hot liquid evenly over the prepped vegetables. (If you're using plastic containers like I did, place your prepped veggies in a heat-friendly bowl first, so the boiling liquid doesn't melt your container). Let the vegetables come to room temperature, then place in the fridge with lids tightly on. Your pickles should be ready to go within 24-48 hours, and will stay in the fridge for several weeks

Quick Pickled Vegetables | A Hoppy Medium

So far, we've enjoyed the pickled radishes and carrots on Spicy Seitan Tacos, and plan to use them on a cheese board this weekend. The pickled asparagus? That's going into homemade Bloody Marys on Saturday morning!

But really...pickled vegetables are so damn versatile. Dress up sandwiches, burgers, nachos, salads, etc. (I could go on forever). Or, do like I've done all morning and just pop those tasty suckers in your mouth, all by their lonesome. The possibilities are endless, people.

What's your favorite pickled vegetable/fruit/ingredient? Our next adventure is to pickle grapes!

Tuesday, April 5, 2016

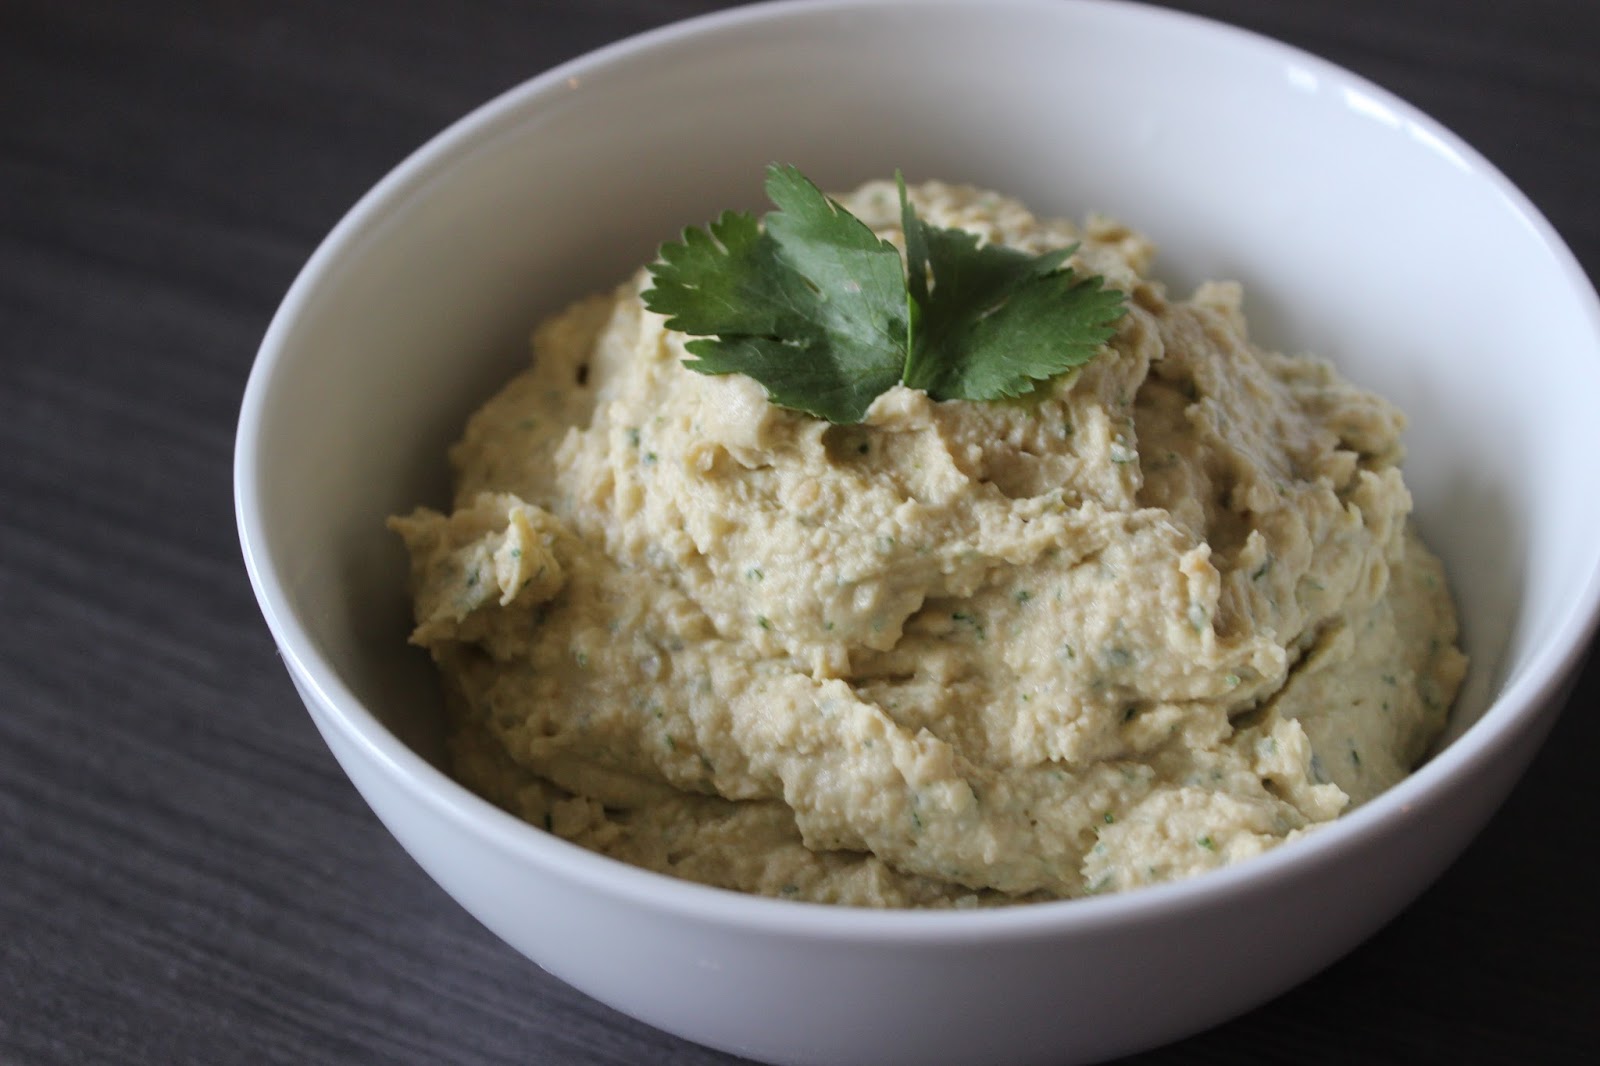
Homemade Cilantro-Jalapeno Hummus

Homemade Cilantro-Jalapeno Hummus | A Hoppy Medium

Hummus? Humus? Houmous?

No matter how you spell the stuff, it's delicious.

I love making hummus - it's easy, it's affordable, and it's super versatile. When I want a straight-up version, I almost always make Ina Garten's recipe, and I actually use a variation of hers when I want to add a little something extra to the mix - such as jalapeno and cilantro.

Ina's recipe makes an addictively smooth and incredibly creamy hummus, and the texture really can't be beat. Throw in some spicy jalapenos and fresh cilantro, and you have yourself one heck of an appetizer (that took a whopping five minutes to make).

Grab a pita chip (and a beer), and let's get scoopin'!

Homemade Cilantro-Jalapeno Hummus | A Hoppy Medium

Homemade Cilantro-Jalapeno Hummus
Yields: About 3 cups 
-1 15-ounce can chickpeas, liquid reserved
-1 fresh jalapeno, seeded and chopped (or, 2 tablespoons pickled jalapenos)
-3 tablespoons tahini
-2 large garlic cloves, peeled
-Juice of 1 lemon
-1/2 cup fresh cilantro
-2 tablespoons liquid from the chickpeas
-Ground cumin
-Salt and black pepper, to taste

Directions:
1.) Place all ingredients in a food processor and puree until smooth. Serve cold or at room temperature with pita chips or fresh pita and/or crudites.

*Fresh hummus will last in the refrigerator for up to 5-7 days. But don't worry: this won't last that long.

Homemade Cilantro-Jalapeno Hummus | A Hoppy Medium

In this hummus, the nuttiness from the tahini and chickpeas, the citrus from the lemon, and the brightness from the cilantro all help complement the spicy jalapeno beautifully. Reserving some of the chickpea liquid is also key in making your hummus wonderfully smooth and creamy.

How do you spell hummus?

Thursday, March 31, 2016

Vanilla-Cardamom Pudding (with Greek Yogurt & Ricotta)

Why is it that I always have leftover ricotta, no matter how small of a container I buy for that one recipe? Or...am I the only one this happens to? Say it happens to you, too...please?

Vanilla-Cardamom Pudding (With Greek Yogurt & Ricotta) | A Hoppy Medium

Anyway, I was yet again left with some extra ricotta, and decided to make something cool and delicious with it. It is FINALLY sunny and 70 degrees here in Portland, after 8,000 months of straight rain (approximately), so I was in the mood for something cold. And with some Chobani Plain Greek Yogurt also in the fridge, I got to working.

Enter: this creamy, perfect-for-spring-time-snacking "pudding" that takes about 5 minutes to make. #micdrop

Vanilla-Cardamom Pudding (with Greek Yogurt & Ricotta)
Yields: About 4 servings
-1 1/2 cups whole milk ricotta
-1/2 cup Chobani Non-Fat Plain Greek Yogurt
-1 vanilla bean, split with the seeds scraped out
-1/2 teaspoon honey
-Pinch of cardamom
-Pinch of salt

Directions:
1.) Place all ingredients in a food processor (or blender) and puree until smooth. Chill in refrigerator for at least 30 minutes before serving so it's nicely chilled.

*Stores in the frigerator for up to 3 days.

**Have a little orange zest on hand? That would only make this pudding even better! Just add a pinch to the food processor before pulsing.

Vanilla-Cardamom Pudding (With Greek Yogurt & Ricotta) | A Hoppy Medium

In all honesty, I've never been a fan of Greek yogurt all by itself, and the yogurts with fruit mixed in are way too sweet for my liking. However, I do love using Greek yogurt in a variety of dishes and recipes like this one, and I almost always buy Chobani - the texture's delightfully thick and creamy, and Chobani's prices tend to be a bit more affordable than most of the other options on the shelves.

Here are some other ways I love to incorporate Greek yogurt in my cooking:

-Substitute sour cream in (and on) Mexican dishes with Greek yogurt - healthier and still delicious!
-Using yogurt in breads, like this Lemon Yogurt Bread with Cardamom Syrup
-Swapping out mayonnaise in egg salad for Greek yogurt
-Blended in smoothies for extra protein and creaminess

How do you enjoy your Greek yogurt - straight up, with granola, some other way?

*This post was not sponsored by Chobani, but I did agree to create a recipe using one of their products. All opinions are my own.

Thursday, March 24, 2016

Arugula-Walnut Pesto

Arugula-Walnut Pesto | A Hoppy Medium

Here are the only three things you need to know about pesto:

1.) Pine nuts are expensive and unnecessary. Raw walnuts (and almonds) are cheaper and add that necessary nuttiness that pesto craves. Save your $!

2.) The basil can be substituted with almost any other green and/or herb. (Some of my favorites, besides arugula: cilantro, parsley, spinach, and kale).

3.) Pesto is delicious on just about anything. But especially: pasta, pizza, and eggs. (Easter brunch will thank you).

Now that you know everything you need to know about pesto, here's a recipe I make whenever we have leftover arugula in the fridge. I love the peppery bite arugula adds to traditional pesto, and this - like all pestos - is delicious on allofthethings.

Oh, and it's super easy to make. Need I say more?

Arugula-Walnut Pesto | A Hoppy Medium

Arugula-Walnut Pesto
Yields: About 2 cups
-2 cups packed arugula
-1 clove garlic
-1/4 cup raw, unsalted walnuts
-1/2 cup grated Parmesan cheese
-2/3 cup extra virgin olive oil
-Juice of 1/2 a lemon
-Pinch of crushed red pepper flakes (optional)
-Salt and black pepper, to taste

Directions:
1.) Add above ingredients (except for salt and pepper) to food processor and pulse until smooth. Taste, and add salt and black pepper as necessary. 
2.) Pour pesto into an airtight container and keep in the fridge for up to five days. If you're not using the pesto right away, it can be stored in the freezer for up to three months.

Arugula-Walnut Pesto | A Hoppy Medium

What are your favorite greens and/or herbs to use in pesto?

Tuesday, February 2, 2016

Red-Wine Spaghetti with Walnuts and Parsley

Guys. Turns out we've been cooking pasta wrong all along.

Red-Wine Spaghetti with Walnuts & Parsley | A Hoppy Medium

Instead of boiling water, we should have been boiling RED WINE.

What were we thinking???

Red-Wine Spaghetti with Walnuts & Parsley | A Hoppy Medium

Z found this recipe for Red-Wine Spaghetti a few weeks ago, and I immediately knew we had to make it. I mean, the recipe basically tells you to boil carbs in wine, and that it is a good idea. Obviously, I'd be on board.

But the best part about this method of cooking pasta is that the red wine gives the noodles so much savory flavor. And thanks to cooking all the alcohol off, you don't feel like you're biting into warm wine, either. This method really just elevates a somewhat simple pasta dish into a glorious meal.

What are we waiting for? Here's how to make the best damn pasta you've ever cooked.

Red-Wine Spaghetti with Walnuts & Parsley
Yields: 4 generous servings
Adapted slightly from Food & Wine
-5 cups water
-3 1/4 cups dry red wine (I used a local Pinot Noir, and it worked just fine)
-Salt
-1 pound spaghetti
-1/4 cup extra-virgin olive oil
-4 small garlic cloves, minced
-1/4 teaspoon crushed red pepper
-1/2 cup chopped parsley, plus more for garnish
-1 cup walnuts, coarsely chopped
-1/2 cup grated good Parmesan cheese, plus more for serving
-Black pepper

Directions:
1.) In a large saucepan, combine the water with 3 cups of the wine and a large pinch of salt and bring to a boil. Add the spaghetti and cook, stirring, until al dente. Drain, reserving 1/4 cup of the cooking liquid.
2.) In a skillet, heat 2 tablespoons of the oil. Add the garlic and red pepper and season with salt. Cook over moderate heat for 1 minute. Add the remaining 1/4 cup of wine and the reserved cooking liquid and bring to a simmer. Stir in the pasta and cook until the liquid is nearly absorbed, 2 minutes. Add the parsley, nuts, the 1/2 cup of cheese and the remaining 2 tablespoons of oil and toss. Season the pasta with salt and pepper and serve with extra grated cheese and an additional sprinkling of parsley.

Red-Wine Spaghetti with Walnuts & Parsley | A Hoppy Medium

I mean...how easy is that? AND you get to cook carbs in alcohol. Hallelujah!

Have you ever cooked pasta in red wine before? If not, will you now??